Anthropologist Margaret Mead considers the first step to civilization to be when the first broken bone healed. It means someone helped another and provided care until the latter healed and moved on his own.
Medical knowledge has significantly advanced since then. Nowadays, broken bones aren’t as big a problem as they once were. Sugar tong splints are one of the most common methods for securing a broken or fractured limb. Knowing how to apply one can be of great help if you’re ever in an emergency situation.
Here’s a brief guide to how sugar splinting can be performed.
Table of Contents
What Is Sugar Tong Splinting?
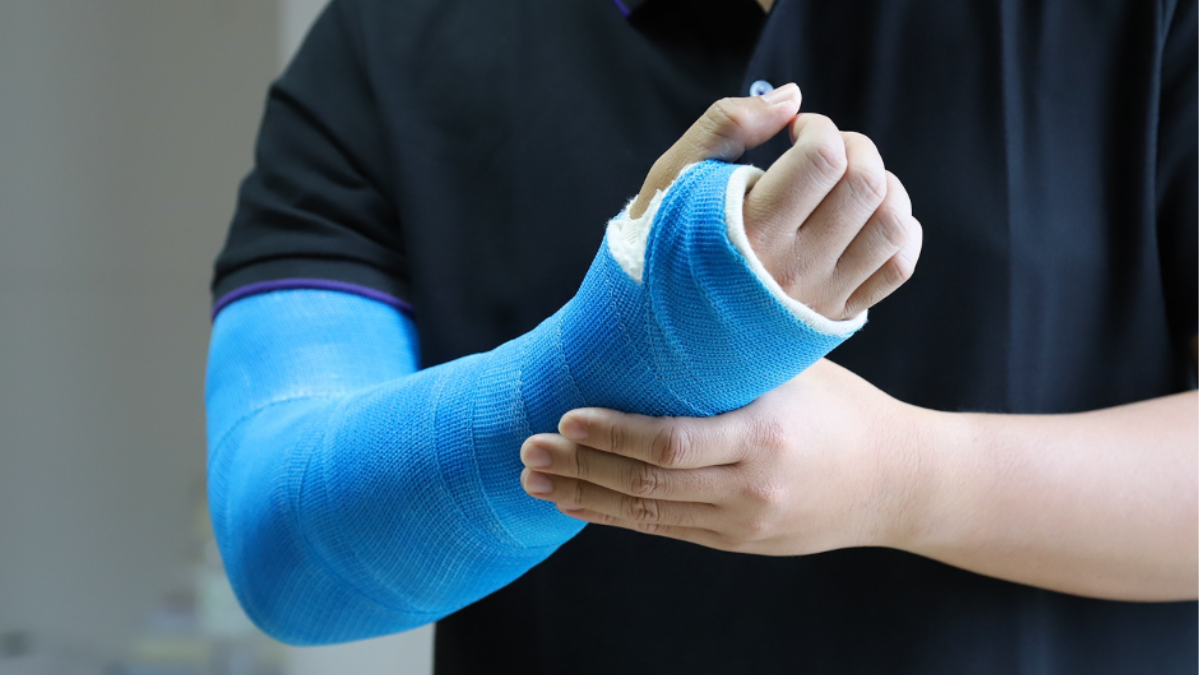
As you know, sugar tong splinting is a method for bracing broken or fractured limbs. The bone is set in place and braced within the splint. This keeps it steady and allows it to heal naturally.
Sugar tong splints are most often used in the treatment of fractures or breaks on the upper forearm and wrist. However, it’s often adapted for other limbs, most notably ankles and lower legs.
The process typically involves fitting an elongated U-shaped fiberglass injury stabilizer along the limb. After that, the splint is reinforced, usually with padding and plaster. Sugar tong splinting gets its name because the U-shaped piece resembles a tong used for picking up sugar cubes.
Why You Should Know How To Do A Splint
Life is unpredictable. You won’t know you need it until you need it. If you ever do, you’ll thank your past self for learning how to apply a sugar tong splint.
Injuries can happen anywhere from anything. Perhaps your child fell off the jungle gym while playing the part. Maybe a friend fell a bit too hard and injured an arm while stopping the fall. Or perhaps a travelling companion sustained a truck accident injury. Think of anything that might cause damage to an arm.
Knowing how to make a splint can be immensely helpful in such situations. The goal shouldn’t be to perfectly heal the wound if you’re performing emergency first-aid. Rather, you’ll most likely be relieving pain, keeping the limb secure, and protecting from further injury until the person arrives at a hospital.
The Equipment Needed
Of course, you’ll need a few tools and materials to make a sugar tong splint. There are several kits available on the market. These would ideally give you everything you’ll need, including instructions. Here’s a list of what you’d need:
- Gloves
- Padding
- Splinting material (usually fiberglass and/or plaster)
- Scissors
- Stockinette
- Elastic bandage
- Water (preferably lukewarm)
That bullet list covers the basics of what you’ll most probably need to make a sugar tong splint. The specific need might vary, depending on the situation. It’s also good practice to keep some wound-cleaning supplies handy. There might be blood. It’s even better if you have a first-aid kit.
The Steps
You understand what you’re trying to do. You know what you need. Now it’s time to get to the steps:
- Put your gloves on. You may not need them if there’s no blood. But it’s good practice to wear gloves when doing this.
- Clean any blood and wounds. Disinfecting and cleaning any wounds can help prevent infection and additional complications.
- Apply stockinette. A medical stockinette looks like a sleeve or a long glove that extends the forearm. This is optional, but it can act as extra padding and help prevent blisters from forming within the splint. If you apply a stockinette, ensure the thumb isn’t covered.
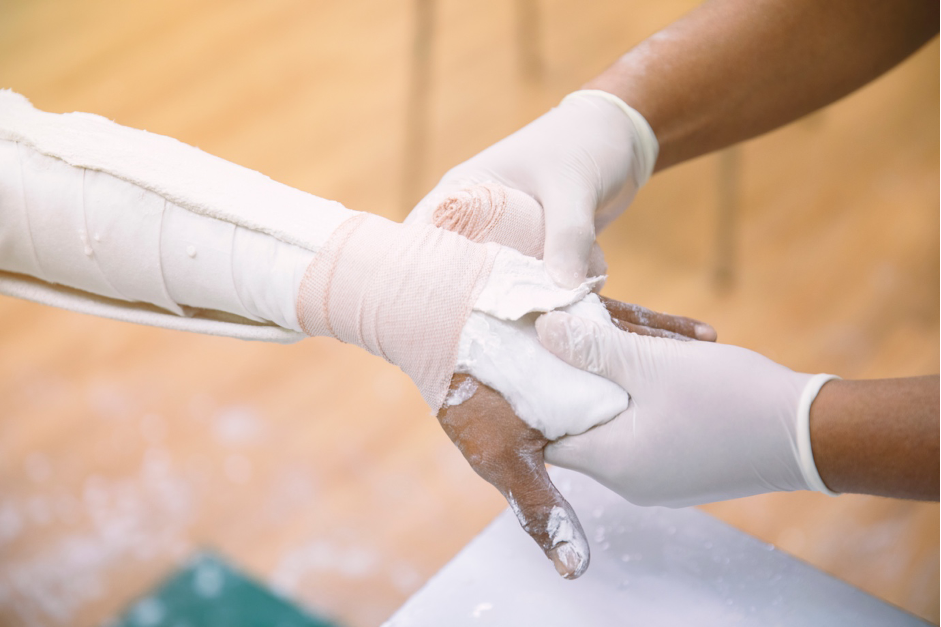
- Find the length of the padding. Now, measure the padding. Keep the elbow at a 90° angle. This is the position the forearm must be in. It’s also recommended to keep the wrist extended at around 10°. Measure the length of the padding. Start in the lower section of the palm, up the forearm, around the elbow, and then back around to the top of the hand. You’ll want to cut about 10 pieces of padding of this length.
- Prepare the splinting material. First, wet it in lukewarm water. Then you want to measure the splinting material to match the padding. Sandwich the material between layers of padding on a flat surface. Depending on the thickness of each, you’ll want six to ten layers of padding on the inside, six to eight layers of splinting material, and then one to two layers of padding on the outside. This can maintain comfort when the splint is being worn.
- Place the splinting material. Place it in the same position where you measured the padding earlier (which should be the position the arm has remained in since). Ensure there are no creases and folds. Get the patient or an assistant to hold everything in place.
- Wrap it in an elastic bandage. Starting at the elbow, wrap around and work your way to the palm. Don’t wrap too tight or too loose. If the person feels pain or discomfort, it’s probably a sign that it’s too tight or there’s not enough padding. Secure the bandage.
- Seek professional help. Get the injured person to a doctor or a hospital as soon as possible.
Conclusion
Performing a sugar tong splint can very well help an injured person deal with a sprain, fracture, or bone break. But it must be done well. Pay attention, apply everything carefully, and ensure the limb is kept in a proper position. These considerations are essential if you want to safely immobilize the limb and prevent further injury.
Remember, this quick guide covers the basics, but it can’t beat certified first-aid training. If you truly want to be prepared at all times, have the equipment and proper training for it.