Have you recently made a shift to your new dwelling? Even after a big investment on building your own home or renovating the existing one, homeowners often end up noticing some nagging flaws on their walls. Right after painting them fresh or even months later, walls will inevitably begin to wear over time. Nail-pops, bad joints, and corner-bead cracks will continuously plague your walls.
For an impressive home decor, everyone wants their house walls to be flat. Flat, smooth, and perfect walls are the key essentials of a well-constructed project. Mudding thin coats of drywall might sound messy but it can be beneficial for perfect walls.
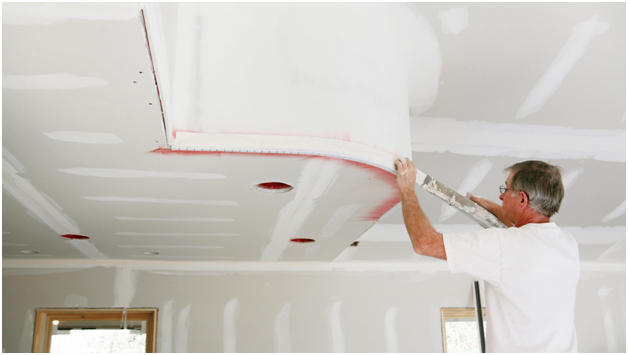
To make your next taping job more successful, learn the proper order ‘how to mud drywall.’
No longer, it’s essential to live with unwanted marks or holes in your walls. Filling damaged areas and cracks can be done in easy steps.You need to know about the process of how to tape and mud drywall in minutes. For smaller hicks and dents, fill them with drywall mud using a three to four -inch putty knife.
Table of Contents
Smart Hacks to Mud Drywall
Learn more about the drywall taping and furnishing tools you need to get the job done.
Save Expenses on Proficiently Taping Drywall
Even on small jobs, you can save several hundred dollars. Do it yourself and give it a try with this methodical approach. They need to have the right tools and materials for doing the tapping. In this guide, the simplified professional techniques are shared so that you can learn them easily and achieve good results.
Make your taping easier with the pro-consultation. Start making use of the new drywall taping supplies that prove to work better and are far more durable.
Follow the Guidelines to Tape Drywall Corners
So, learn how to tape drywall corners. The smart trick is to pick up enough corner beads to cover every corner with a single bead. Next, you will need a small box of 1-⅝ inch drywall nails for fastening the corner beads. If your room is of average size, you can make use of one and two rolls of paper tape.
Further prevention is needed to keep the finished wall intact from developing cracks along the drywall seams. The three different types of tapes used are paper, mesh, and preformed.
Hopefully, now you have drawn the idea of tapping drywalls. Familiarize yourself with the taping process of mudding drywalls.
If you want to achieve the most professional results, you can use the paper tape. It helps to create smooth joints. In paper taping you will find that it comes with a crease down the center. It is of great use while building the sharp wall corners. With practice, you can correctly apply bed paper tape in the first coating of the wet mud. Gradually, you will grow your skill and can avoid the bubbles underneath.
Do with a Right Mud Mixture
When it comes to knowing how to mud drywall, the foremost thing that one has to do is to get the right mud mixture. You can buy a dry mix or a ready-mixed mud. Also, you can choose the mixture type that comes in different forms such as quick setting, easy sand, or the standard grade.
If big holes and gaps appear on the walls, use the cheaper dry mix. You are free to use as much as you require to protect the damaged areas. The professionals prefer to buy it from large home improvement stores. Next, it is harder to apply on larger surfaces because recoating is not as smooth as you can do on other substances.
Careful Selection of Knives for Mudding Drywall
For leveling up your knowledge on how to tape and mud drywall, you should now find the right kind of stuff . To make your walls look smooth and perfect, it is better to choose plastic knives that have smooth edges. Consult an expert before purchasing the useful knives, followed by a 6 inch knife, a 10 inch knife, and a 12 inch knife. Also, you require a putty knife for managing the tight spots. To do it with correct operatives, it is better to choose a drywall mud pan or a plaster “hawk”.
Final Processes
While applying, you have to be careful that the mud is dry. When it gets ready, you are free to apply the third coat making the edges smooth and blended into the wall. The addition of successive layers of mud helps to increase the size of the joint and it surely adds more compound to the edges.
After the surface gets completely dried, you need to sand everything with the usage of a pole sandera and 120-grit paper. You need to run the pole over the joints across a smooth surface to fade lines between the edge of the compound.
Conclusion
There are ample ways to apply the proper techniques of mudding the drywall. The comprehensive step-by-step guide helps to simplify the task. Before starting the task, ensure more about the drywall mud types. To avoid glitches, keep the tools handy. To make your project a big success, check out the mistakes that need to be avoided.
Check the important tips for the rookies. You need to cut corners off corner beads at roughly 45 degrees. Wherever you are taping, you should feather the outside edges of each and every coat. Avoid being sloppy on ceilings because spray texture will not hide poor taping. Feel confident and you don’t have to muddle through anymore.
For more information on home improvement, visit HouseDecorationTip.